
What Does It Take to Install a Split System Air Conditioner?
Split system air conditioners are Australia's most popular home cooling and heating solution, and it's easy to see why. They're efficient, relatively affordable and work well in everything from a single bedroom to an open-plan living area. But buying the unit is only half the job. Understanding how to install a split system air conditioner properly, and who is legally allowed to do it, is just as important as picking the right model.
This guide walks you through the full installation process from start to finish. You'll learn how to choose the right unit and location before the installer arrives, what happens on the day of installation, who must carry out the electrical and refrigerant work under Australian law, and what a realistic installation cost looks like. By the end, you'll know exactly what to expect.
Key takeaways
- Installing a split system air conditioner requires a licensed installer with an ARC licence and electrical qualifications.
- Choosing the correct capacity and placement before installation saves money and improves performance.
- Labour costs typically range from $600 to $1,500 depending on site complexity and wall type.
Before the Installer Arrives: Choosing the Right Unit and Location
The decisions you make before a single tool comes out of the bag have a direct impact on how well your system performs and what you'll pay to get it running. Getting the capacity and placement right from the start saves you money on installation and avoids performance headaches down the track.
Picking the Right Capacity for Your Room
Choosing the correct kilowatt output for your space is the single most important decision in the whole process. An undersized unit runs flat out and never quite cools the room, wasting electricity and wearing out the compressor early. An oversized unit short-cycles, switching on and off too frequently to properly dehumidify the air, leaving the room feeling clammy even when the temperature reads right.
A practical starting point for Australian climates is roughly 0.125 kW per square metre for a well-insulated room with average ceiling height. So a 28 square metre bedroom needs around 3.5 kW of capacity. The Daikin Cora 3.5kW Inverter Split System (FTXV35WVMA) at $1,287 is one of the most popular choices for bedrooms and small living areas, offering strong energy efficiency and whisper-quiet operation. The Mitsubishi Electric MSZ-AP35VGKD 3.5kW Split System at $1,229 is a reliable alternative with a solid track record in Australian homes.
Keep in mind that ceiling height, insulation quality, window size and sun exposure all affect the final sizing calculation. For a full breakdown of how to size your unit accurately, read our guide on what size air conditioner do I need.
Where to Mount the Indoor and Outdoor Units
Once you've settled on capacity, the next step is deciding exactly where both units will go. These choices affect airflow, efficiency, noise levels and how much pipe run the installer needs to cover, which directly influences labour cost.
For the indoor unit, the ideal position is high on an exterior wall, centred in the room where possible. Mounting it high allows cool air to fall naturally across the space. Avoid placing it above a doorway where airflow will be interrupted, directly above a bed or desk where the draft will be uncomfortable, or anywhere it faces direct sunlight or sits near a heat source like an oven or fireplace. A clear, unobstructed airflow path in front of the unit is essential for rated performance.
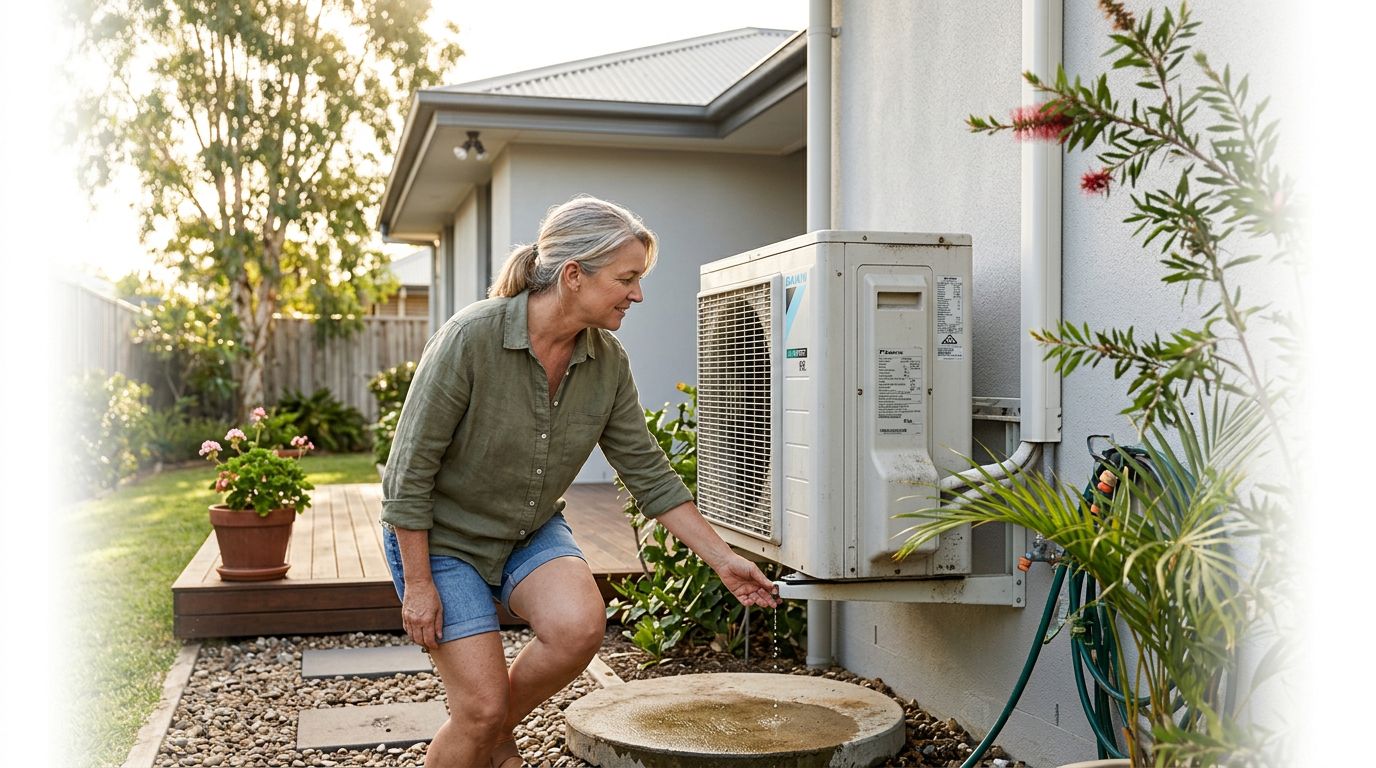
For the outdoor unit, clearance is everything. The unit needs adequate space on all sides for airflow, typically at least 30 cm on the sides and 60 cm at the front. Avoid enclosed spaces like narrow side passages or garden sheds. Placing the outdoor unit in a shaded spot where possible will improve efficiency on hot days, but never block the airflow trying to shade it. Also think about noise. The outdoor unit produces a steady hum during operation, so positioning it directly outside a neighbour's bedroom window or your own living area is worth avoiding.
The shorter the pipe run between indoor and outdoor units, the lower your installation cost and the more efficiently the refrigerant circuit operates. Aim for a straight, direct route through the wall where possible. For a detailed look at siting your outdoor unit correctly, see our guide on where to place your outdoor unit.

How to Install a Split System Air Conditioner: The Step-by-Step Process
Installing a split system air conditioner involves eight distinct stages, starting with mounting the indoor bracket and finishing with a full operational test. The first five steps cover mechanical work that a competent tradesperson completes on-site. Steps 6, 7 and 8 involve refrigerant handling and electrical connections that are legally restricted to licensed tradespeople under Australian law.
- Mount the indoor unit bracket on the wall. The installer locates the wall studs using a stud finder, marks the bracket position at the correct height and checks it is perfectly level with a spirit level. The bracket is then secured directly into the studs with appropriate fixings. A bracket that is even slightly off-level will cause the indoor unit to drain poorly and can lead to water leaks inside the room.
- Drill the wall penetration hole. A core drill is used to cut a hole through the wall, typically 65 to 75 mm in diameter. The hole is angled slightly downward toward the outside so that condensate water drains away from the building naturally. A flat or inward-sloping hole will cause water to pool inside the wall cavity.
- Feed the line set and cables through the hole. The refrigerant pipes, electrical power cable, condensate drain line and communication wiring are bundled together and fed through the wall penetration. The bundle is usually wrapped in insulation tape or a protective sleeve before being passed through to keep everything tidy and protected.
- Connect and hang the indoor unit. The refrigerant pipes are flared and connected to the indoor unit's service ports. The electrical and communication cables are wired into the terminal block. Once all connections are made, the unit is clipped onto the wall bracket. The installer checks that it sits flush and level before moving outside.
- Position and secure the outdoor unit. The outdoor unit is placed on its mounting feet or a purpose-built wall bracket, depending on the site. It must sit on a firm, level surface with adequate clearance on all sides. Anti-vibration pads are fitted under the feet to reduce noise transmission into the building structure.
- Connect refrigerant lines, electrical wiring and communication cables to the outdoor unit. This step must be carried out by a licensed tradesperson. The refrigerant line connections are tightened to the manufacturer's specified torque, and all electrical terminations are made to the outdoor unit's terminal block. Incorrect connections here can cause compressor failure or create a serious electrical hazard.
- Pressure-test and vacuum the refrigerant lines. Before any refrigerant is released, the installer pressure-tests the line set with dry nitrogen to check for leaks. Once the system passes the pressure test, a vacuum pump is connected and the lines are evacuated to remove all moisture and air. This step is critical. Moisture left in the refrigerant circuit will form acid over time and destroy the compressor. This work requires an ARC licence.
- Release refrigerant, power up and test. With the vacuum confirmed, the service valves on the outdoor unit are opened to release the factory charge of refrigerant into the system. The installer powers up the unit, checks the operating pressures, confirms the system is heating and cooling correctly, and tests the remote control and any Wi-Fi functions. The installation is complete once the system holds stable operating conditions.
Steps 6, 7 and 8 are not optional extras for a licensed installer. Handling refrigerant without an ARC licence is a federal offence in Australia, and unlicensed electrical work is illegal in every state and territory. Any attempt to complete these steps yourself will void your manufacturer's warranty and may result in significant fines.
Who Can Legally Install a Split System in Australia?
In Australia, two separate licences are required to complete a split system installation legally. An ARC (Australian Refrigeration Council) licence is needed to handle refrigerants, and a licensed electrician must carry out all electrical wiring. In practice, most qualified air conditioning installers hold both credentials, so you typically deal with a single tradesperson or installation team.
The ARC licence requirement is a federal obligation under the Ozone Protection and Synthetic Greenhouse Gas Management Act. It applies to anyone who purchases, handles, recovers or charges refrigerants such as R32 or R410A. There are no state-by-state exemptions. If your installer cannot produce an ARC licence number, they cannot legally touch the refrigerant circuit. For a full breakdown of what an ARC licence is and why your installer needs one, our dedicated guide covers everything you need to know before booking a job.
The electrical requirement sits alongside the refrigerant rules. All wiring from the switchboard to the outdoor unit, and between the indoor and outdoor units, must be completed by a licensed electrician. In most states this means the installer must hold a Certificate of Electrical Safety upon completion of the work.
DIY installation is not a grey area. Attempting to connect refrigerant lines or carry out electrical wiring without the appropriate licences is illegal, creates genuine safety risks and will void your manufacturer's warranty outright. Take the Fujitsu 3.5kW Lifestyle Inverter Split System (ASTG12KMTC) at $1,190 as a straightforward example. Fujitsu's warranty terms require professional installation by a licensed contractor. If the unit is self-installed and develops a fault, the warranty claim will be rejected regardless of whether the fault is related to the installation.
The practical takeaway is simple. Before any installer starts work, ask to see their ARC licence number and confirm they are a licensed electrician. Both checks take 30 seconds and protect you from significant financial and legal exposure down the track.
How Long Does Installation Take and What Does It Cost?
A standard single-head split system installation by an experienced installer takes two to four hours from start to finish. That covers mounting the indoor bracket, drilling the wall penetration, running the line set, making all electrical and refrigerant connections, pressure-testing, vacuuming and commissioning the system. More complex jobs can push well beyond that window.
Factors that add time and cost include brick or double-brick walls (which require a hammer drill and take longer to core), long pipe runs where the indoor and outdoor units are far apart, routing through a roof space or ceiling cavity, and any electrical upgrade work such as running a new dedicated circuit from the switchboard. A job that looks straightforward on paper can become a half-day project once the installer is on-site.
On cost, here is a realistic breakdown for 2026:
| Installation Scenario | Typical Labour Cost |
|---|---|
| Standard single-storey home, short pipe run, timber frame wall | $600 to $900 |
| Brick wall, longer pipe run or awkward outdoor unit placement | $900 to $1,200 |
| Difficult access, roof space routing or electrical upgrade required | $1,200 to $1,500+ |
These figures cover labour only. The unit itself is a separate cost. The Daikin Cora 3.5kW Inverter Split System (FTXV35WVMA) retails at $1,287, so a typical supply-and-install package for a bedroom unit in a standard home lands somewhere between $1,900 and $2,500. Difficult access or extra electrical work can push that figure higher.
For a full breakdown of what drives installation pricing, including multi-head systems, storey height and regional labour rates, read our air conditioning installation cost guide.
FAQ: Installing a Split System Air Conditioner
Can I install a split system air conditioner myself?
You can complete some of the mechanical work yourself, such as mounting the indoor bracket and positioning the outdoor unit, but you cannot legally complete the installation on your own. Connecting the refrigerant lines requires an ARC licence under federal law, and all electrical wiring must be carried out by a licensed electrician. Attempting either without the appropriate licence is illegal, creates genuine safety risks and will void your manufacturer's warranty.
How long does it take to install a split system air conditioner?
Most standard split system installations take two to four hours for an experienced installer. That includes mounting both units, running the line set, making all electrical and refrigerant connections, pressure-testing and commissioning the system. Jobs involving brick walls, long pipe runs or roof space routing can take five to six hours or more.
Do I need an electrician to install a split system?
Yes. All electrical wiring associated with a split system installation must be carried out by a licensed electrician. This includes the wiring from the switchboard to the outdoor unit and the interconnecting cables between the indoor and outdoor units. In most Australian states, the electrician must also issue a Certificate of Electrical Safety on completion of the work.
How much does it cost to install a split system air conditioner in Australia?
Labour for a standard single-head split system installation in a single-storey home typically starts at $600 to $900 in 2026. Difficult access, brick walls, long pipe runs or electrical upgrade work can push the labour cost to $1,500 or more. Add the unit price on top of that. A 3.5kW bedroom unit plus installation in a straightforward home generally comes to between $1,900 and $2,500 all up.
Ready to Install a Split System? Start With the Right Unit
Split system installation is a straightforward professional job that most experienced installers complete in half a day. The key things to take away from this guide are that you need a licensed installer who holds both an ARC licence and an electrician's licence, the total cost depends on the unit you choose and the complexity of the job, and getting the capacity and placement right before the installer arrives makes the whole process smoother and cheaper.
The unit you start with sets the tone for everything that follows. A well-matched system installed correctly will run efficiently for 10 to 15 years with minimal fuss. A poorly sized or badly sited unit will cost you more to run and more to fix.
Browse the full range of split system air conditioners at AusAir Conditioners to compare models, capacities and prices across all the major brands, with nationwide delivery and competitive pricing across the board.