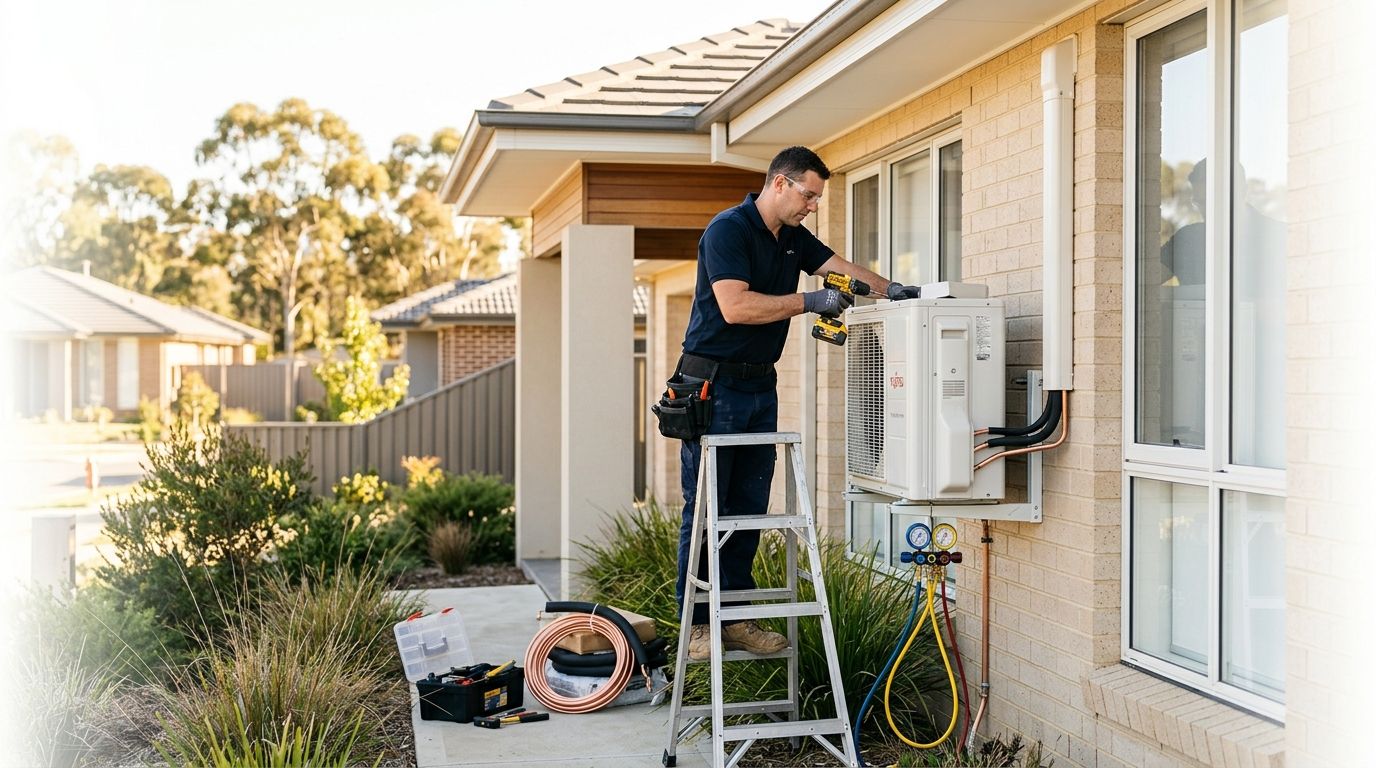

What Does Installing an Air Conditioning Unit Actually Involve?
Most homeowners feel uncertain before their first air conditioning installation. You know you want to be cooler in summer and warmer in winter, but the actual process of installing an air conditioning unit can feel mysterious. The good news is that most residential jobs follow a predictable sequence, even if the specifics vary between a single-room split system and a whole-home ducted setup. This article walks you through four main stages: choosing the right system, the physical installation, electrical and refrigerant work, and the final commissioning and handover.
Key takeaways
- Installing an air conditioning unit involves four stages: system selection, site assessment, physical installation and commissioning.
- A licensed ARC technician must handle all refrigerant work and electrical connections.
- Single split systems take three to five hours; ducted systems take one to three days.
Step 1: Choosing the Right System Before Installation Begins
The decisions you make before a single bracket is mounted will shape the entire installation. Getting this stage right saves you money, avoids undersized or oversized equipment, and means the installer can get the job done efficiently. Here is what to work through before you book anyone in.
- Choose your system type. The three most common residential options are split systems, multi-head split systems and ducted air conditioning. Each has a different installation footprint, cost and level of disruption. See the subsection below for a quick breakdown.
- Size the unit correctly for your space. This is where many homeowners come unstuck. An undersized unit runs constantly and never quite reaches your target temperature. An oversized unit short-cycles, wears out faster and leaves rooms feeling clammy because it does not run long enough to dehumidify properly. Room size, ceiling height, insulation, window area and local climate all factor into the right kilowatt rating. Read our guide on what size air conditioner you need before committing to a unit.
- Select a brand and model. Once you know the capacity you need, you can compare models within that range. For a standard bedroom or small living area, a 3.5kW split system is the most popular starting point. The Daikin 3.5kW Cora Inverter Split System (FTXV35WVMA) at $1,287 is a solid, accessible entry-level option. If you want built-in WiFi and a step up in features, the Daikin 3.5kW ALIRA X Inverter Split System (FTXM35YVMA) sits at $1,447 and is one of the more popular mid-range choices on the market.
Split System, Multi-Head or Ducted: Which Installation Is Right for You?
Split systems are the most straightforward installation of the three. A licensed technician mounts the indoor wall unit, positions the outdoor compressor, runs refrigerant lines through a small hole in the wall and connects the electrical wiring. Most single-room split system installs are completed in two to four hours.
Multi-head systems follow the same basic process but involve multiple indoor units connected to one outdoor compressor. The installer needs to plan the refrigerant line routing carefully across rooms, which adds time and complexity compared to a single split.
Ducted systems are a different scale of job entirely. They require ceiling or underfloor space for ductwork, a central indoor unit (usually in the roof cavity), zoning controls and significantly more planning before work begins. Installation typically takes one to three days depending on the size of the home. For a full breakdown of what ducted air conditioning involves, see our dedicated guide.

Step 2: The Site Assessment and Pre-Installation Planning
A site assessment is the visit your licensed installer makes to the property before any physical work begins. During this visit, the technician checks wall and ceiling space, outdoor unit placement options, electrical capacity and pipe run distances. Skipping this step is one of the most common reasons installations run over budget or require expensive rework on the day.
- Assessing wall and ceiling space for the indoor unit. The installer checks that the chosen wall can support the bracket load, that there is enough clearance above and to the sides of the unit for proper airflow, and that the wall cavity does not contain obstructions like noggins or plumbing that would complicate the pipe run. For ducted systems, the roof cavity is inspected for clearance, access points and structural suitability.
- Identifying the best outdoor unit placement. The compressor needs adequate airflow on all sides, a stable surface to sit on and a location that does not create noise issues for neighbours. The installer will also check local council setback rules, which vary by state and can affect how close the unit can sit to a boundary fence. See the subsection below for the key placement rules.
- Checking the existing electrical switchboard capacity. A split system draws a dedicated circuit from your switchboard. If the board is old, already at capacity or lacks a suitable circuit breaker, an electrician may need to upgrade it before installation can proceed. This is a cost that catches some homeowners off guard, so it is worth asking about upfront.
- Measuring the pipe run distance between indoor and outdoor units. Refrigerant lines have a maximum recommended length, and longer runs can reduce system efficiency or require a larger refrigerant charge. Your installer will measure the most practical route for the pipes and flag any issues before quoting. Your installer must hold a valid ARC licence to legally handle refrigerant in Australia. No licence means no legal right to connect or commission the system, regardless of how experienced the tradesperson claims to be.
If a company skips the site assessment and quotes purely from photos or a floor plan, treat that as a warning sign. Surprises discovered on installation day, like an undersized switchboard or a blocked wall cavity, almost always result in extra charges or delays.
Where Should the Outdoor Unit Go?
Outdoor unit placement affects efficiency, noise, longevity and your relationship with your neighbours. A good installer will work through these rules with you during the site assessment rather than just mounting the unit wherever is easiest for them.
- Face north or east where possible. These aspects avoid the harsh western afternoon sun, which forces the compressor to work harder and reduces efficiency on the hottest days of the year.
- Maintain clearance on all sides. Most manufacturers specify a minimum of 300mm at the sides and rear, and at least 600mm at the front discharge. Blocking airflow causes the unit to overheat and can void the warranty.
- Keep it away from dripping rooflines. Constant water dripping onto the unit accelerates corrosion, particularly in coastal areas where salt is already a factor.
- Consider noise and neighbour proximity. Compressors produce a low hum that carries, especially at night. Positioning the unit away from bedroom windows, both yours and your neighbour's, avoids complaints down the track.
For a full breakdown of outdoor unit placement rules, see our dedicated guide.
Step 3: The Installation Day — What Happens and How Long It Takes
A standard single-head split system installation takes three to five hours from start to finish. Ducted systems typically take one to three days depending on the size of the home and the complexity of the ductwork layout. Here is the sequence a licensed installer follows for a typical split system job.
- Mount the indoor unit bracket. The installer fixes a heavy-duty mounting plate to the wall at the chosen height, using a level to ensure it sits perfectly straight. The bracket carries the full weight of the indoor unit, so it must be anchored into studs or masonry, not just plasterboard.
- Drill the penetration hole. A core drill creates a hole through the wall, angled slightly downward toward the outside so condensate water drains away naturally. The diameter is sized to fit the refrigerant lines, electrical cable and drain pipe together in a single neat pass.
- Mount the indoor unit and route the lines. The indoor unit clips onto the bracket. The installer then routes the refrigerant lines, electrical cables and condensate drain pipe through the wall penetration, wrapping them in insulation and protective cladding on the exterior run.
- Mount the outdoor unit. The compressor is secured to either purpose-built wall brackets or a concrete slab at ground level. The installer confirms the unit is level and that all clearance requirements are met before connecting anything.
- Connect the refrigerant lines and pressure-test the system. The copper refrigerant lines are flared and connected to both units. The installer then pressurises the line set with nitrogen to check for leaks before any refrigerant is introduced. This step is non-negotiable and a sign of a quality installation.
- Vacuum the lines. A vacuum pump removes all air and moisture from the refrigerant lines. Moisture left in the system can freeze, damage the compressor and cause long-term reliability problems. The vacuum must hold for a set period before the installer proceeds.
- Release refrigerant and power up. With the lines confirmed clean and leak-free, the installer opens the refrigerant valves, connects the electrical supply and powers the system on for the first time.
A popular unit for standard residential installs is the Fujitsu 3.5kW Lifestyle Range Inverter Split System (ASTG12KMTC) at $1,190. It has a compact indoor unit profile that suits most standard wall configurations and the installation sequence above applies to it without any unusual complications.
What the Installer Checks Before Handing Over
Powering the unit on is not the end of the job. A thorough installer runs through a commissioning checklist before they pack up and leave, and you should expect nothing less.
- Refrigerant pressure check. The installer reads the operating pressures against the manufacturer's specifications to confirm the refrigerant charge is correct. An undercharged or overcharged system will not perform to its rated capacity.
- Test all modes. Cool, heat and fan modes are each tested to confirm the system responds correctly and reaches the target temperature. This is also when any fault codes or unusual noises are investigated before the installer leaves.
- Confirm the condensate drain is flowing. The installer checks that water is draining correctly from the indoor unit to the outside. A blocked or incorrectly pitched drain line is one of the most common causes of water leaks inside the home.
- Walk the homeowner through the remote and settings. A good installer will explain the basic functions, set the clock and timer if needed, and advise on filter cleaning. Ask them to show you how to clean your AC filter and how often to do it. For most split systems, a clean every four to six weeks during heavy use is the standard recommendation.
If the installer rushes through commissioning or skips the handover entirely, ask them to slow down. Understanding your system from day one means fewer service calls and a longer lifespan for the unit.
How to Find the Right Unit Before You Book an Installer
The air conditioning installation process follows four clear stages: choosing the right system, completing a site assessment, carrying out the physical installation, and commissioning the unit before handover. Get those stages right and the job itself is straightforward, provided a licensed professional does the work. The biggest variable in any installation is the unit you choose before anyone picks up a drill.
If you are ready to start comparing options, the Daikin 3.5kW ALIRA X Inverter Split System (FTXM35YVMA) at $1,447 is a strong all-rounder for most Australian homes. It covers a standard living area or large bedroom, includes built-in WiFi and sits at a price point that balances features with value. Browse the full split system range to find the right capacity and brand for your space.
If you want to work out your full budget before buying, our air conditioning installation cost guide breaks down what to expect from labour, electrical work and any extras that can come up on the day.
Frequently Asked Questions
Can I install an air conditioning unit myself?
You cannot legally install a split system or ducted air conditioner yourself in Australia. Federal law requires a licensed refrigerant handling technician, holding an ARC (Australian Refrigeration Council) licence, to connect refrigerant lines. Attempting this without a licence risks heavy fines, voided manufacturer warranties and potential safety hazards. Portable and window units are the only types a homeowner can self-install, as they do not require refrigerant line connections.
What is the $5000 rule for AC?
The '$5,000 rule' is a general industry guideline suggesting that if a repair quote exceeds $5,000, replacing the system is usually the more economical choice. It is a rule of thumb rather than a fixed standard, so the age of the unit and its refrigerant type also matter. An older system running on R22 refrigerant, for example, is far harder and more expensive to service than a modern R32 unit, which tips the balance toward replacement even at lower repair costs.
How much would it cost to install an air conditioning unit?
A standard single-head split system installation typically costs between $600 and $1,500 in labour, depending on the complexity of the job and your location. Ducted systems cost significantly more, often starting from $3,000 in installation labour alone. For a full breakdown of what affects the final price, see the AusAir installation cost guide at ausairconditioners.com.au/blogs/guides/air-conditioning-installation-cost-australia.
Do you need an electrician to install an air conditioner?
You do need licensed electrical work for an air conditioner installation, and most qualified air conditioning installers hold both their ARC accreditation and an electrical licence, or work alongside a licensed electrician. Any new dedicated circuit or switchboard modifications must be completed by a licensed electrician under Australian law. The refrigerant side of the job is a separate qualification entirely, requiring ARC accreditation, which a general electrician does not automatically hold.